
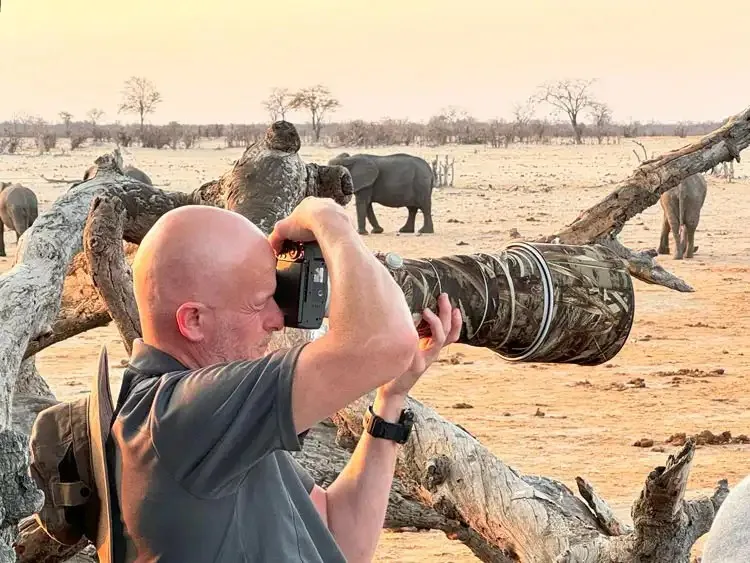
Common Safari Photography Mistakes to Avoid
The pitfalls that ruin safari photos and how to fix them: shutter speed, cluttered backgrounds, over-zooming, chasing the trophy shot, chimping, and running out of card and battery.
Most disappointing safari photos are not caused by cheap gear. They come from a handful of avoidable habits: shutter speeds too slow to freeze a flick of the tail, backgrounds full of distracting branches, or eyes glued to the screen while the real moment happens in front of the lens. The encouraging truth is that fixing these mistakes costs nothing. A few decisions made before the light gets good, and a few habits practised until they are automatic, will lift your keeper rate more than any lens upgrade. Wildlife rewards the photographer who is ready, not the one with the biggest bag. This guide walks through the errors guides see again and again on game drives, and the simple corrections that turn near misses into images you will actually print. Learn them at home so the bush does not have to teach them the hard way.
Key things to know
- Keep shutter speed high enough to freeze movement, not just the animal
- Watch the background as carefully as the subject
- Do not always zoom to maximum; leave room for context and behaviour
- Stop chimping and keep your eye on the animal for the real moment
- Use a beanbag; a sharp image beats a blurry one every time
- Shoot in the golden light of early and late day, not harsh noon
- Bring enough cards and batteries so you never stop shooting
- Anticipate behaviour rather than reacting to it after the fact
Shutter speed too slow
The single most common ruined shot is soft because the shutter was too slow. Animals twitch, birds explode into flight and vehicles vibrate, so a speed that looks fine on the screen often hides motion blur at full size. As a rule, keep at least one over your focal length for static animals, and push to a thousandth of a second or faster for anything moving.
The fix is to embrace higher ISO. Modern cameras produce clean, printable files at ISO levels that would have horrified film shooters, and a slightly grainy sharp image always beats a clean blurry one. Set a minimum shutter speed with auto-ISO so the camera protects your sharpness while you concentrate on the animal.
- Static subjects: at least 1/focal length, faster if you can
- Walking or feeding animals: around 1/1000s
- Birds in flight or a sprint: 1/2000s or faster
- Use auto-ISO with a shutter-speed floor to stay safe
- Brace on a beanbag and switch the engine off when possible
Cluttered and distracting backgrounds
A perfect animal in front of a messy background is a wasted frame. Bright twigs, a distant vehicle, a blown-out patch of sky or a stripe of harsh light will pull the eye away from your subject every time. Many photographers see only the animal and miss the chaos around it until they are home.
Train yourself to scan the whole frame before pressing the shutter. Often a small change of position, a lower angle, or waiting for the animal to step into a cleaner patch transforms the image. A wide aperture blurs the background, but composition and patience do far more than any lens to isolate your subject.
Over-zooming and forgetting the story
It is tempting to zoom all the way in on every animal, but a frame packed edge to edge with a lion can feel airless and repetitive. Tight portraits have their place, yet the images people remember often show the animal within its world: the herd on the plain, the leopard along the branch, the elephant dwarfed by a storm sky.
Make a habit of shooting both. Take the safe tight frame, then zoom out and look for the environmental picture and the behaviour. Leaving space in the direction an animal looks or moves gives the image life, while cramming it against the edge of the frame makes it feel trapped.
Chimping and missing the moment
Chimping, constantly checking the screen after every shot, is how photographers miss the yawn, the kill, the interaction they came for. Wildlife does not wait while you admire the last frame. The decisive moment almost always arrives when your eye has left the viewfinder.
Check your exposure once when the light or scene changes, then trust your settings and keep watching through the lens. Learn to read behaviour so you are pressing the shutter as the action begins, not scrambling after it. Anticipation, not reaction, is what separates a lucky snapshot from a photograph.
- Check exposure once at the start, then stop reviewing
- Keep both eyes open to see action develop around you
- Watch for pre-behaviour cues: a crouch, a stare, ears back
- Pre-focus where you expect the action to happen
- Shoot bursts through peak action, review later at camp
Running out of card, battery or light
Nothing is more painful than a full memory card or a dead battery when the leopard finally moves. Cold dawns drain batteries faster than you expect, and a few bursts of action can fill a card in minutes. Carry more of both than you think you need and swap before they run empty, not after.
Light is the other resource people waste. The harsh, flat light of midday flattens colour and blows out highlights, while the low golden light of the first and last hours gives warmth, shape and catchlights in the eyes. Plan your serious shooting around dawn and dusk, and use the middle of the day to rest, back up files and clean gear.
- Carry spare batteries and keep them warm in a pocket
- Bring more memory cards than you expect to fill
- Offload and back up files during the midday break
- Shoot the golden hours; rest through harsh noon light
- Clean dust off lenses and sensor when the action is quiet
References & further reading
- Sinclair, A. R. E., et al. (Eds.) (2015). Serengeti IV. Chicago: University of Chicago Press.
- Estes, R. D. (2012). The Behavior Guide to African Mammals. Berkeley: University of California Press.
- Kingdon, J. (2015). The Kingdon Field Guide to African Mammals (2nd ed.). London: Bloomsbury.
- IUCN (2024). The IUCN Red List of Threatened Species, Version 2024-1. www.iucnredlist.org.
Do it with SafariLingo
Take SafariLingo on safari: 300+ species, real animal calls, offline maps and sighting logs — all in your language, wherever you roam.
Get the appFrequently asked questions
What shutter speed should I use on safari?
For still animals, at least one over your focal length, so 1/500s with a 500mm lens. For walking animals aim for around 1/1000s, and for birds in flight or running predators 1/2000s or faster. Use auto-ISO with a minimum shutter speed so the camera keeps you sharp.
Why do my safari photos look soft even in focus?
Usually the shutter was too slow to freeze subtle movement or vehicle vibration, or you were not braced. Raise your shutter speed, lift the ISO without fear, rest the lens on a beanbag and turn off the engine. A sharp higher-ISO frame always beats a blurry clean one.
Should I always zoom in as much as possible?
No. Tight portraits are great, but also zoom out for environmental images that show the animal in its habitat and capture behaviour. Leaving space around the subject, especially in the direction it looks or moves, usually makes a stronger, more storytelling photograph.
How do I stop missing the best moments?
Stop chimping. Check your exposure once when the light changes, then keep your eye on the animal and learn to read pre-behaviour cues like a crouch or a stare. Anticipate the action and shoot bursts through it, reviewing your images later back at camp.
Related guides
 Wildlife
 Smartphone Safari Photography Tips
How to bring home beautiful safari photos with just your phone: digiscoping through binoculars, wide landscapes, video, avoiding digital zoom, steadying your shot and realistic expectations.
 Wildlife
 How to Photograph Elephants and Big Mammals
A field guide to photographing elephants, rhinos and buffalo: conveying scale, capturing texture and family life, using backlight and dust, and keeping a respectful, safe distance.
 Wildlife
 Black-and-White Wildlife Photography on Safari
When and how to shoot wildlife in monochrome: using harsh light, texture and mood, dust and rain, elephants and rhinos, learning to think in tones, and balancing in-camera choices with post-processing.