
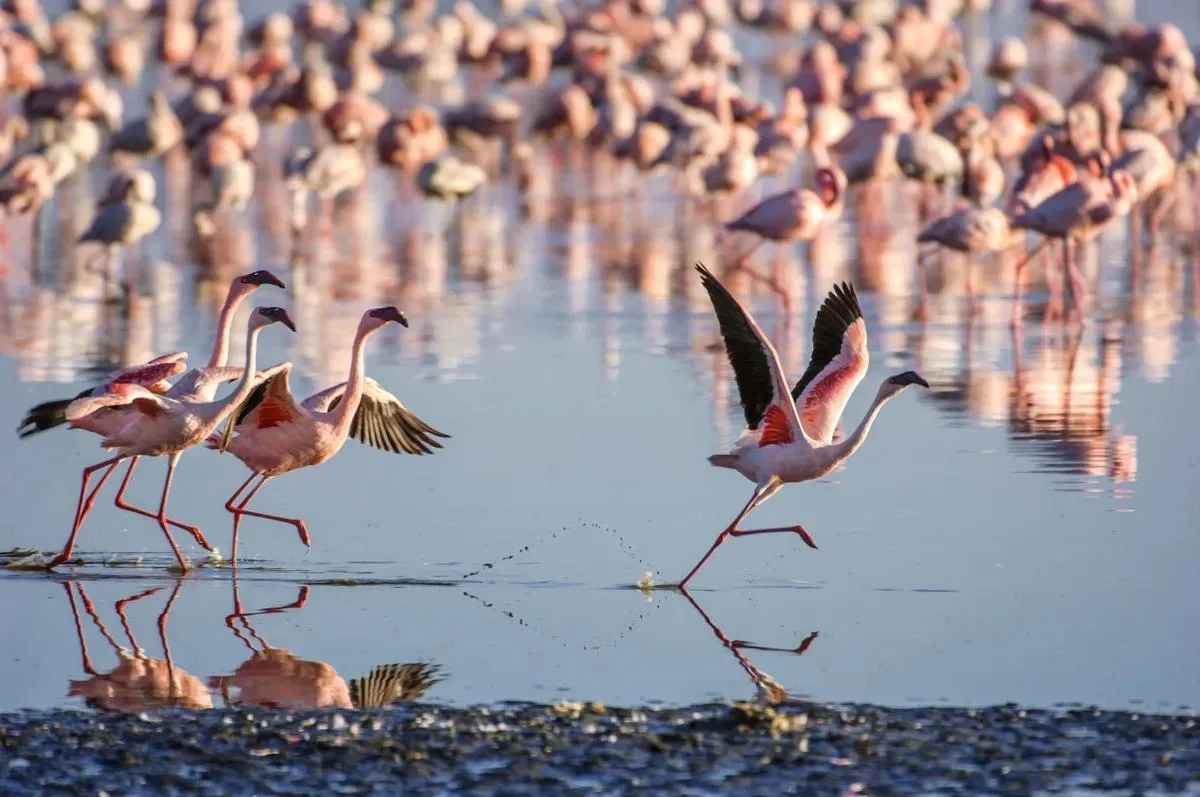
How to Photograph the Great Migration
A field guide to photographing the Great Migration: capturing crossing chaos, dust and action, choosing wide versus tight framing, telling the story, the ethics of positioning, protecting your gear and the patience it demands.
The Great Migration is one of the most photographed wildlife spectacles on Earth, and also one of the hardest to shoot well. A river crossing can erupt after hours of stillness and be over in minutes, unfolding in a churn of dust, water, hooves and predators that overwhelms an unprepared photographer. The images that endure are rarely the luckiest; they are the ones made by someone who understood the event, prepared their gear and their mind, and was ready when chaos arrived. Good migration photography is as much about restraint and storytelling as it is about fast shutter speeds. Anyone can fire a burst at a stampede, but the frames that move people are the ones that convey scale, tension and emotion: the hesitation at the water's edge, the leap, the single wildebeest silhouetted against a wall of dust. That requires thinking in advance about what story you want to tell and how you will frame it, not just reacting to the action in front of you. This guide covers the craft of shooting the migration: reading the crossing, balancing wide and tight compositions, telling a coherent story, behaving ethically around a fragile and dangerous event, protecting equipment from dust and water, and cultivating the patience that separates a snapshot from a photograph. Settings and gear are described in general terms; adapt them to your camera, and always follow your guide's instructions on positioning and safety.
Key things to know
- A crossing can start suddenly and end in minutes, so preparation beats reaction.
- Fast shutter speeds freeze hooves and spray, but the story matters more than sharpness alone.
- Alternate wide shots for scale with tight shots for emotion and detail.
- Think about the story you want to tell before the action begins.
- Ethical positioning never blocks the animals' path or pressures them at the water.
- Dust and water are relentless, so protect your gear and carry backups.
- Patience is the core skill; most of the time is spent waiting, not shooting.
- Follow your guide's instructions absolutely, for both ethics and safety.
Reading the Crossing
The single most useful skill in migration photography happens before you press the shutter: learning to read a crossing. Herds often gather at the water's edge for a long time, milling, advancing and retreating, testing the bank and their own nerve. An experienced guide can read these signs, judging when a crossing is likely and where the animals may enter and exit, which is why positioning is a joint decision made calmly in advance rather than a scramble at the last second.
Use this build-up. While the herd hesitates, set your exposure, check your focus mode, decide on your first composition and pick out potential subjects. Watch the light and the dust, and think about where the drama will unfold: the entry point, the deepest water, the far bank where exhausted animals climb out and predators may wait. When the crossing finally erupts it will be fast and confusing, so the calmer and better prepared you are during the wait, the more likely you are to come away with frames that matter.
- Herds mill and test the bank for a long time before committing.
- A good guide predicts likely crossing points and timing.
- Set exposure and focus during the build-up, not during the chaos.
- Identify entry points, deep water and the far bank in advance.
- Stay calm while waiting so you are ready when it erupts.
Freezing Chaos: Dust and Action
A crossing is a storm of motion, and capturing it sharply starts with shutter speed. To freeze galloping legs, flying spray and leaping bodies, you generally want a fast shutter, often well above what you would use for a static portrait, and you accept a higher ISO to get it. Continuous autofocus tracking and a burst mode help you follow erratic movement and give you a choice of peak moments, but resist the urge to simply hold the button down; short, deliberate bursts at the decisive instant yield more usable frames and less to wade through later.
Dust is both a challenge and a gift. It can fool your exposure and soften your focus, but it is also what gives migration images their drama, wrapping the herd in golden, backlit haze. Learn to expose for the scene you want rather than letting the camera average everything to grey, and use the dust deliberately, silhouetting animals against it or letting it glow when the sun is low. The goal is not merely a sharp animal but a sharp animal inside a believable, atmospheric moment.
- Use a fast shutter to freeze legs, spray and leaping bodies.
- Accept a higher ISO as the price of that speed.
- Use continuous focus tracking for erratic movement.
- Fire short, deliberate bursts rather than holding the button.
- Use dust for atmosphere, and expose for the effect you want.
Wide Versus Tight
One of the biggest mistakes at a crossing is shooting everything at the same focal length. The most compelling coverage alternates between wide and tight. Wide shots convey the scale of the event: the endless column of animals, the crowded bank, the vast landscape that dwarfs them. Tight shots deliver emotion and detail: a single face straining out of the water, locked horns, the spray thrown up by a leap. A story told only in wides feels distant; one told only in tights loses the sense of magnitude.
Practically, this means either carrying two bodies with different lenses or being disciplined about zooming and recomposing. Decide in the calm before the crossing which lens does which job, so you are not fumbling when it counts. Many photographers open wide to establish the scene, then move tighter as the action peaks, then pull back again for the aftermath. Thinking in this sequence, rather than firing randomly, is what turns a folder of frames into a coherent set of images.
- Wide shots convey scale, crowding and landscape.
- Tight shots deliver emotion, faces and detail.
- Carry two bodies or be disciplined about zooming.
- Decide which lens does which job before the action.
- Move from wide to tight and back to build a sequence.
Telling the Story
The strongest migration photography is not a random pile of action frames but a story. Every great event has a beginning, a climax and an aftermath, and consciously shooting all three gives your images narrative power. Before the crossing, capture the tension: the gathering herd, the hesitation, the first animal testing the water. During, capture the climax: the plunge, the struggle against the current, the predators. After, capture the aftermath: the exhausted survivors climbing out, the stragglers, the dust settling on an emptying bank.
Think, too, about the emotional beats that make a single image resonate. A lone wildebeest silhouetted against dust says more about the journey than a thousand indistinct animals. A calf following its mother, a hesitation on the brink, a moment of stillness amid the chaos, these are the frames viewers remember. Approaching the migration as a storyteller rather than a machine gunner changes not only what you shoot, but how you feel while shooting it, and usually improves both.
- Shoot the beginning, climax and aftermath of the event.
- Capture tension before the crossing, not just the action.
- Look for single, emotive subjects that carry the story.
- Quiet moments amid chaos often resonate most.
- Think like a storyteller, not a machine gunner.
Ethics and Positioning
A river crossing is a moment of extreme stress for the animals and can be dangerous for everyone present, so ethics and positioning are not optional refinements but core responsibilities. The golden rule is simple: never let vehicles block the animals' path to or from the water. Herds that are crowded, cut off or frightened may balk, turn back, or panic into deep water, and animals can drown or be injured as a direct result of badly positioned vehicles. Good operators hang back, approach quietly and give the herd room to choose its own line.
This is where trusting your guide matters most. Resist the urge to ask for a closer position or a better angle if it means pressuring the animals, and be patient if the guide holds back or repositions calmly. A slightly more distant, ethical frame is always better than a dramatic one obtained by harming the event. Keep noise down, stay inside the vehicle unless told otherwise, and remember that your presence is a privilege. The best migration photographers are known for their restraint as much as their images.
- Never let vehicles block the path to or from the water.
- Crowded or frightened herds may balk or panic into danger.
- Trust your guide and do not pressure them for a closer angle.
- An ethical, distant frame beats a harmful, dramatic one.
- Keep noise down and treat your presence as a privilege.
Gear, Dust and Patience
The migration is hard on equipment. Fine dust gets into everything and water spray is a constant risk at crossings, so protection matters. Keep lens changes to a minimum in dusty conditions, use covers or a simple rain sleeve when spray is likely, carry a blower and cloths, and clean your gear carefully each evening. Bring spare batteries and cards, because a crossing is exactly the wrong moment to run out, and consider a second body so you are never caught mid-lens-change when the action starts.
Above all, the migration rewards patience. For every explosive crossing there are long, hot hours of waiting, false starts and herds that gather and then wander away without entering the water. This is normal, and fighting it only leads to frustration and missed frames. Settle in, stay alert, keep your camera ready, and treat the waiting as part of the experience rather than an obstacle to it. The photographers who come away with the strongest images are almost always the ones who were still watching, calm and prepared, when everyone else had put their cameras down.
- Minimise lens changes and protect against dust and spray.
- Carry a blower, cloths, spare batteries and cards.
- Consider a second body to avoid mid-change disasters.
- Expect long waits, false starts and crossings that never happen.
- Stay ready and calm; patience produces the best frames.
References & further reading
- Sinclair, A. R. E., et al. (Eds.) (2015). Serengeti IV. Chicago: University of Chicago Press.
- Estes, R. D. (2012). The Behavior Guide to African Mammals. Berkeley: University of California Press.
- Kingdon, J. (2015). The Kingdon Field Guide to African Mammals (2nd ed.). London: Bloomsbury.
- IUCN (2024). The IUCN Red List of Threatened Species, Version 2024-1. www.iucnredlist.org.
Do it with SafariLingo
Take SafariLingo on safari: 300+ species, real animal calls, offline maps and sighting logs — all in your language, wherever you roam.
Get the appFrequently asked questions
What shutter speed should I use for a river crossing?
Fast enough to freeze galloping legs and flying spray, which generally means a much higher speed than you would use for a static portrait, accepting a higher ISO to achieve it. Exact numbers depend on your camera, lens and the light, so think in ranges and test before the action. Use continuous autofocus tracking and short, deliberate bursts rather than holding the button down.
Should I shoot wide or tight at the migration?
Both, and deliberately alternating between them. Wide shots convey the scale of the event, the crowded bank and the vast landscape, while tight shots deliver emotion and detail such as a straining face or locked horns. Decide which lens does which job before the crossing, and move from wide to tight and back so your images form a coherent story rather than a single repetitive view.
How do I photograph the migration ethically?
The core rule is never to let vehicles block the animals' path to or from the water, because crowded or frightened herds may balk, turn back or panic into deep water and be harmed. Trust your guide's positioning, do not pressure them for a closer angle, keep noise down, and accept a more distant frame over a dramatic one obtained by stressing the animals. Your presence is a privilege, not a right.
How do I protect my gear from dust and water?
Keep lens changes to a minimum in dusty conditions, use a cover or rain sleeve when spray is likely, and carry a blower and cloths to clean gear each evening. Bring spare batteries and memory cards, and consider a second body so you are not caught mid-change when a crossing erupts. Careful daily cleaning greatly extends the life of equipment used in these harsh conditions.
Do I really need so much patience for migration photography?
Yes. For every dramatic crossing there are long, hot hours of waiting, false starts and herds that gather and wander off without entering the water. This is completely normal. The photographers who capture the strongest images are usually the ones who stayed alert, calm and camera-ready when others had given up, so treat the waiting as part of the experience rather than an obstacle.
Related guides
 Wildlife
 Common Safari Photography Mistakes to Avoid
The pitfalls that ruin safari photos and how to fix them: shutter speed, cluttered backgrounds, over-zooming, chasing the trophy shot, chimping, and running out of card and battery.
 Wildlife
 Smartphone Safari Photography Tips
How to bring home beautiful safari photos with just your phone: digiscoping through binoculars, wide landscapes, video, avoiding digital zoom, steadying your shot and realistic expectations.
 Wildlife
 How to Photograph Elephants and Big Mammals
A field guide to photographing elephants, rhinos and buffalo: conveying scale, capturing texture and family life, using backlight and dust, and keeping a respectful, safe distance.