
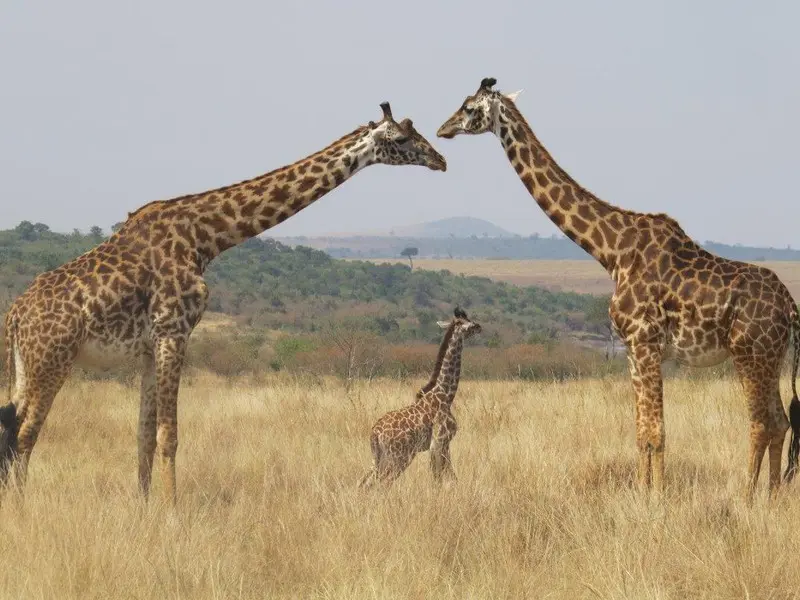
Photography Tips for Safari Beginners
Practical wildlife photography tips for safari beginners — light, focus, composition, camera settings, gear, patience and the mistakes to avoid to bring home images you're proud of.
You don't need a decade of experience or a bag of five-figure lenses to come home from safari with photographs that stop conversations. What you need is a handful of habits — about light, focus, composition, stillness and timing — that separate a strong wildlife image from a shaky snapshot. Master these and even a modest camera or a bridge superzoom will produce pictures that carry the smell of the dust and the weight of the moment. Safari photography is really a form of observation. The camera rewards travellers who read behaviour, sit patiently through a slow sighting, and are ready when a lion finally lifts its head or an elephant turns into the light. Nothing else matters as much: no lens focal length, no autofocus module, no editing plug-in will save an image where the timing was wrong or the eye was soft. This guide distils the essentials for beginners: how to work with the light rather than against it, sensible starting settings on any camera made in the last decade, composition rules that actually help in the field, the gear that punches above its weight, and the common mistakes that quietly ruin frames. Everything here comes from real drives, not a classroom — and the same principles work whether you're shooting the Serengeti at dawn or a leopard at last light in Sabi Sand.
Key things to know
- Focus on the eye — a wildlife image lives or dies on a sharp eye
- Work the golden hours; save your best light for dawn and the last hour
- Shoot at eye level whenever you safely can, not from a standing tourist pose
- Use a fast shutter (1/1000s or quicker) whenever anything might move
- Steady long lenses on a beanbag over the door and cut engine vibration
- Learn continuous autofocus, back-button focus and short bursts before you fly
- Leave room to look or move into the frame; blur busy backgrounds with a wide aperture
- Slow down and read behaviour — the best frames are waited for, not chased
Light, focus and composition
Three fundamentals separate a snapshot from a strong wildlife image, and they are the same on every continent. First, light. The soft, warm, low sun of the golden hours — roughly the hour after sunrise and the hour before sunset — flatters fur, feathers, dust and skin, and creates the long shadows and directional glow that give a photograph shape. Plan your most ambitious shooting for these windows and accept that midday, with its flat, harsh top light and squinting animals, is usually a time to rest, back up cards, and scout for later. In East and Southern Africa the equator makes those windows short but reliable; be in position before the light starts, not chasing it as it fades.
Second, focus, always on the nearest eye. A wildlife photograph is a portrait, and portraits live or die on the eye — a pin-sharp eye rescues a slightly soft body, but a sharp shoulder with a soft eye is nearly always a delete. Use a single focus point (or a small cluster) placed on the eye rather than trusting the whole autofocus array to guess. Third, composition. Get to eye level whenever the vehicle and safety allow: dropping low turns a flat record shot into an intimate portrait, and even a small change in height changes the emotional register of the frame. Leave a little breathing room in the direction the animal is looking or moving, include enough habitat to tell the story of where it lives, and use a wide aperture to lift the subject cleanly off a busy background.
- Shoot in the golden hours; treat midday as scouting and rest time
- Focus on the near eye with a single point; a sharp eye redeems soft fur
- Drop to eye level for intimacy — even lowering yourself in the seat helps
- Leave space to look into and blur backgrounds with wide apertures
- Watch the direction of the light: side and back light often beat front light
Simple settings that work
You don't have to master every menu before you go. A reliable starting point on any interchangeable-lens camera is aperture-priority mode, aperture around f/5.6 to f/8 for enough depth of field on a big cat or elephant, and auto-ISO with a sensible upper cap (say 6400 on modern bodies, 3200 on older ones). Set a minimum shutter speed of at least 1/500s so the camera raises ISO before it lets shutter drop, and you'll have a workable exposure straight from the vehicle. The moment there is any action — a run, a jump, birds in flight, a stalking cat — switch to shutter priority or manual and dial in 1/1000s or faster; 1/2000s for birds, 1/3200s for a hunt.
Two more habits matter more than most beginners realise. Turn on continuous autofocus (AF-C or AI-Servo) so the camera tracks a moving animal rather than locking on and slipping behind it, and learn back-button focus so your shutter finger no longer refocuses every frame — it changes how you shoot forever. Shoot short bursts of three to six frames rather than single clicks, so you catch the head turn, the yawn or the wing beat you can never predict. Steady long lenses on a beanbag draped over the vehicle door rather than hand-holding, ask the guide to cut the engine at a sighting, and don't be afraid to bump ISO higher than you'd like — a slightly grainy sharp image beats a clean blurred one every time.
- Start in aperture priority at f/5.6–f/8 with auto-ISO capped
- Set a minimum shutter around 1/500s in the auto-ISO settings
- Switch to 1/1000s+ (1/2000s for birds, 1/3200s for hunts) for action
- Use continuous autofocus and back-button focus; shoot short bursts
- Beanbag over the door, engine off, and don't fear a higher ISO
Gear that actually earns its place
You don't need a professional kit, but a few pieces of gear disproportionately improve your results. A telephoto lens reaching at least 300mm on full frame (or an equivalent 200mm on a crop body) is the single most useful upgrade — 400mm or 500mm is better still for birds and shy cats, but longer isn't always more usable, and heavier lenses need heavier support. A second, shorter zoom around 24–105mm handles landscapes, camps, wide elephant scenes and environmental portraits where the whole herd or the whole hill matters. Two bodies with lenses fitted removes lens changes in dusty vehicles, which is a real gift when the light is racing and dust storms follow every drive.
Beyond glass, invest in a beanbag (many camps supply one, but a good filled bag ready to travel is a small luxury), plenty of memory cards, at least two spare batteries per body, a rocket blower and a microfibre cloth for dust and morning dew, and a dry bag or padded roll for the daily drive. Skip the tripod for game drives — it doesn't fit vehicle life — and reserve a monopod only for walking safaris or hides. If you love birds or long focal lengths, a good pair of 8x42 binoculars is arguably more valuable than another lens: they let you find and read behaviour that you then photograph. And test-fire everything at home before you fly, because a fresh camera in a bumpy vehicle with an angry buffalo is the wrong place to learn a menu.
- One long zoom (300–500mm range) plus one short zoom (24–105mm)
- Two bodies (if possible) to avoid dusty lens swaps
- Beanbag, spare batteries, plenty of cards, rocket blower, microfibre cloth
- Skip tripods on drives; a monopod suits walking safaris or hides
- A quality binocular pair to find and read behaviour before you shoot
Reading the moment
The biggest single improvement most beginners can make is to slow down. Instead of firing off a dozen frames of a lying lion and asking the guide to move on, sit with the sighting: watch how the animal is breathing, where it looks, which way its tail flicks, whether the herd around it is calm or restless. The strong image is almost always the second, third or tenth moment of a sighting, not the first — the yawn, the interaction between two siblings, the head lifted to sniff the wind, the perfect light finally hitting the eye. A guide who understands behaviour can help you anticipate what an animal is about to do; ask, quietly, and share what you're hoping for.
Learn a few behavioural cues that reliably signal photograph-worthy moments. A cat's tail-tip flick and hard stare through the grass often precedes a stalk; an elephant flapping ears widely and raising its trunk is checking wind, and may be about to move; a lion sitting up and licking its lips often means it's about to walk; wildebeest bunching at a river's edge, refusing to drink, is calibrating to cross. Great images live in those margins, but only if the camera is on, the settings are already right for the light, and you are watching rather than chimping the screen after every frame. Take your safe frame first, then wait for the better one.
- Sit longer at good sightings; the best frames come after the first minutes
- Watch tails, ears, eyes and posture for the cue before the action
- Ask the guide to describe what the animal may do next
- Bank a safe frame, then wait for the moment you actually want
- Don't chimp between frames — keep your eye on the animal, not the screen
Common beginner mistakes to sidestep
Certain errors show up in almost every first safari's memory card, and knowing them means you can dodge them. Shooting everything from a standing tourist pose flattens perspective and forces down-angled portraits; instead, lower yourself in the seat or use a pop-top vehicle's lower window whenever you can. Forgetting shutter speed when action erupts is another classic — a beautiful cheetah chase reduced to motion-blurred smudges because the camera was still set for the sleeping cat you saw ten minutes before. Set expected shutter speed as soon as any action becomes plausible, not after it starts.
Other pitfalls include composing so tightly that no habitat or breathing space remains, missing the wider environmental image entirely, obsessing over the Big Five while ignoring superb light on a lone tree or a bee-eater, and spending the whole sighting behind the viewfinder so you have no memory of the animal itself. Take your shots, then lower the camera and simply watch — the memory matters as much as the photograph, and paradoxically it makes you a better photographer, because you learn how animals actually move. Finally, back up your cards every night to two locations, and clean sensors and lenses gently in camp: sensor dust and smeared glass ruin more images than technique ever will.
- Don't shoot from a standing pose; drop lower for perspective
- Reset shutter speed the moment action becomes plausible
- Leave breathing room; shoot wide environmental frames too
- Photograph the small, quiet subjects — light, birds, textures, trees
- Back up every card each night and clean sensor and lens gently
What a good safari photography brief looks like
If photography really matters to you, tell your operator and guide before the trip in specific terms. Say what you love shooting (portraits of big cats, birds in flight, landscapes at scale, night-time subjects, elephants against skies), what focal lengths you carry, and how much you're willing to wait for a single frame — because on a shared vehicle, the difference between a photographer's pace and a first-timer's pace is real. Some operators offer dedicated photographic vehicles with lower seats, drop-down doors, extra bean bags, charging points and inverters; if you can budget one, it pays back many times over in image quality.
Be realistic about compromises. On classic vehicle drives you can't dictate the angle to the sun on every sighting, and etiquette limits how long a shared vehicle can hold on a subject. But a good guide who knows you care will position you carefully, mention which side to sit on before each drive, and manage speed and stops for your camera. On private conservancies, off-road driving and low-angle approaches transform what's possible; in national parks, patience at a known predator or a good waterhole often beats chasing. Above all, decide what one image you'd genuinely be thrilled to bring home and steer the trip gently around it — a plan beats hope every drive.
References & further reading
- Sinclair, A. R. E., et al. (Eds.) (2015). Serengeti IV. Chicago: University of Chicago Press.
- Estes, R. D. (2012). The Behavior Guide to African Mammals. Berkeley: University of California Press.
- Kingdon, J. (2015). The Kingdon Field Guide to African Mammals (2nd ed.). London: Bloomsbury.
- IUCN (2024). The IUCN Red List of Threatened Species, Version 2024-1. www.iucnredlist.org.
Do it with SafariLingo
Take SafariLingo on safari: 500+ species, real animal calls, offline maps and sighting logs — all in your language, wherever you roam.
Get the appFrequently asked questions
What is the single most important tip for safari photography?
Focus on the animal's near eye and keep it sharp — a wildlife image lives or dies on the eye. Add good light in the golden hours, an eye-level angle where you can, a fast enough shutter and patience for the moment, and you already have the foundation of every strong safari frame.
What camera settings should a total beginner use on safari?
Start in aperture priority around f/5.6 to f/8 with auto-ISO capped and a minimum shutter around 1/500s, then switch to 1/1000s or faster in shutter priority for any action. Use continuous autofocus, a single focus point on the eye, and shoot short bursts of three to six frames rather than single clicks.
How do I take sharp photographs from a safari vehicle?
Ask the guide to stop and cut the engine at a sighting to remove vibration, then rest the long lens on a beanbag draped over the door or window frame. Use a fast shutter speed, keep focus on the eye, and avoid shooting while the vehicle is actually moving; brace with your body, don't fight the lens.
Do I really need an expensive camera and lens for safari?
No. Technique — light, eye-level, focus on the eye, patience — matters far more than gear, and a modern superzoom or a mid-range mirrorless with a 100–400mm lens will make images you're proud of. Invest first in a beanbag, spare batteries, plenty of cards and, arguably most valuable of all, a good pair of binoculars.
How can I improve my safari photos beyond just settings?
Slow down and read behaviour rather than chasing frames. Sit longer at good sightings, learn the visual cues that signal a yawn, a stalk or a run, and be ready with your camera set for the light you already have. Take one safe frame, then wait patiently for the better one — and put the camera down often to simply watch.
Related guides
 Planning & Tips
 Jet Lag and Your First Day on Safari
How to handle jet lag on safari and make the most of your first day: adjusting to the time zone before, during and after the flight, easing into dawn starts, and using the safari rhythm itself as a cure.
 Planning & Tips
 Ethical Wildlife Tourism on Safari
What ethical wildlife tourism means on safari — putting animal welfare first, choosing responsible operators, avoiding exploitative attractions, and ensuring your money helps rather than harms.
 Planning & Tips
 What Is a Conservancy?
A clear guide to wildlife conservancies, how they differ from national parks and reserves, and what community or private conservation means for your safari experience and impact.