
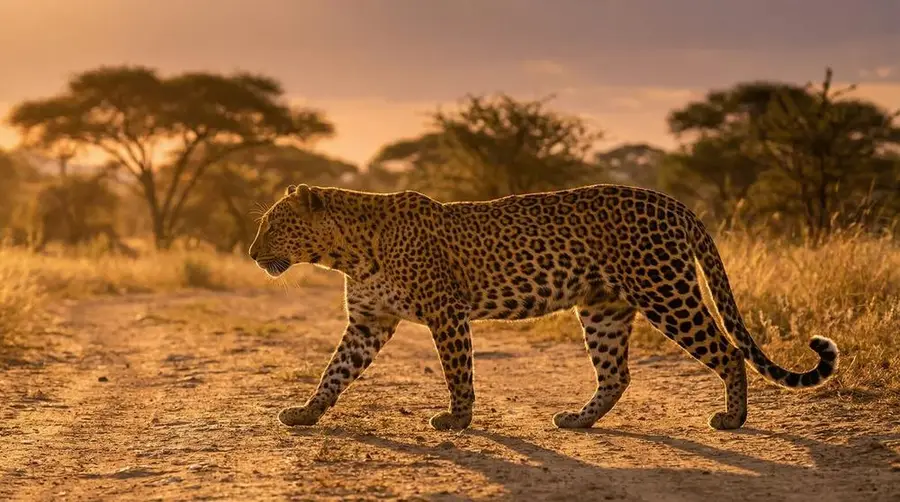
Golden Hour Safari Photography
How to make the most of golden hour on safari — why the light matters, techniques for warm portraits and dramatic scenes, mastering backlight and silhouettes, camera settings, and making the most of the fleeting best light.
Ask any wildlife photographer their secret and 'the light' will be near the top of the list. The golden hours just after sunrise and before sunset bathe the bush in warm, soft, directional light that transforms ordinary sightings into extraordinary images — and, happily, these are exactly the hours when animals are most active. On safari, chasing the light and chasing the wildlife are the same pursuit, which is why guides structure every drive around dawn and dusk. The difference between a flat snapshot and a photograph that seems to glow is rarely the animal or even the camera; far more often it is the quality and direction of the light falling on the scene. Learn to read that light, to anticipate how it will rake across a lion's mane or rim a dust cloud, and you begin to see photographs before you take them. This is the shift from merely recording what you saw to making an image that conveys how it felt. This guide explains why golden-hour light is so flattering, how to work with it for warm portraits and dramatic scenes, how to use backlight and silhouettes creatively, and the practical camera settings and habits that help you catch fleeting moments. Understand the light and you will return with images that glow rather than merely document, and with the confidence to make the most of every precious golden minute.
Key things to know
- Golden hour light is warm, soft and directional — ideal for wildlife
- It coincides with the animals' most active hours at dawn and dusk
- Keep the low sun behind you for warm, evenly lit subjects
- Use side light for texture, shape and long, sculpting shadows
- Backlight and silhouettes create dramatic, artistic images
- Be ready early and stay out late, as the best light is brief
- Learn fast exposure adjustments as the light changes quickly
- Work the angle with your guide rather than shooting from anywhere
Why the light matters
Around sunrise and sunset the sun sits low on the horizon, so its light travels through far more atmosphere, softening and warming into gold. This low, gentle light does three wonderful things at once: it wraps subjects in warm colour, it rakes across the landscape to reveal texture and shape, and it puts a bright catchlight in an animal's eye that brings a portrait to life. The same scene that looks ordinary at noon becomes luminous when the sun is low.
Compare that to midday, when the sun is high and harsh, casting hard shadows, blowing out highlights and flattening everything into a lifeless glare. This is precisely why guides and photographers structure the day around dawn and dusk — the light and the wildlife activity peak together, so you are rarely choosing between good light and good sightings. The trade-off is that golden hour is fleeting, often little more than an hour, so being in position early and staying out late is essential to catch it before it fades.
- Low sun travels through more atmosphere, warming to gold
- It wraps subjects in colour and reveals texture
- A catchlight in the eye brings portraits to life
- Midday sun is harsh, flat and full of hard shadows
- The best light is brief, so be early and stay late
Working with front and side light
The classic approach is front lighting: keep the low sun behind you so it falls evenly on your subject, saturating colours and lighting the eyes. This is the safest, most reliable way to use golden hour and gives beautifully warm, clean portraits of animals and scenes alike. When in doubt, put the sun at your back and let it do the work, especially for a first attempt at a new subject.
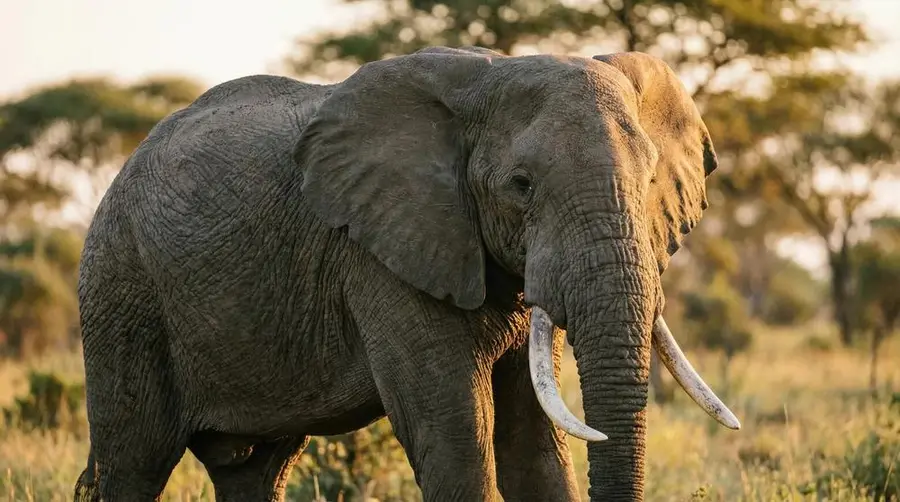
For more depth and drama, try side lighting: position so the light rakes across the subject from the side, emphasising texture, form and long, sculpting shadows — wonderful for a lion's mane, an elephant's wrinkled hide or the ripples of a dune. Because the light shifts fast at these times, keep adjusting your exposure and be ready to ask your guide to reposition the vehicle so the sun stays where you want it. Golden hour rewards those who actively work the angle rather than shooting from wherever they happen to stop.
- Front light: sun behind you for even, warm portraits
- Side light: rake across the subject for texture and shadow
- Reposition the vehicle with your guide to control the angle
- Keep adjusting exposure as the light changes quickly
Backlight and silhouettes
The boldest golden-hour technique is to shoot into the light. Backlighting — with the low sun behind your subject — creates a glowing rim around fur, dust, breath and grass, lending an ethereal, almost magical quality to a scene. Expose carefully to protect the highlights, and use that rim of light to separate your subject cleanly from the background, which is especially striking with a backlit mane or a cloud of dust kicked up by a moving herd.
Take it further and you get silhouettes: expose for the bright sky and let the subject go dark, reducing an acacia tree, a giraffe or a lone elephant to a clean, graphic shape against a blazing sky. These are among the most iconic safari images of all. They work best with a recognisable outline against an uncluttered, colourful sky, so look for a strong shape, place it thoughtfully in the frame with space to breathe, and let the sunrise or sunset do the rest. A little separation between the subject's legs or a raised trunk reads far better than a shapeless blob.
- Backlight rims fur, dust and grass with glowing light
- Expose to protect the bright highlights
- For silhouettes, expose for the sky and let the subject darken
- Choose a strong, recognisable outline against a clean sky
- Leave space around the shape so it reads clearly
Camera settings and being ready
Golden hour moves fast, so it pays to have your camera set up before the moment arrives rather than fumbling as the light peaks. A good starting point is aperture-priority or manual with a moderately wide aperture for portraits, a shutter speed fast enough to freeze movement, and auto ISO with a sensible ceiling so the camera can keep up as the light fades. Shooting in raw gives you the latitude to recover warm tones and rescue highlights later, which matters enormously with strong backlight.
Meter thoughtfully, because the camera will often be fooled by a bright sky or a dark animal. For silhouettes, meter on the bright sky; for a backlit subject you want to keep detailed, meter on the subject and let the background brighten. Learn to use exposure compensation quickly, keep your lens hood on to fight flare, and take a test frame the moment you arrive at a sighting so you are dialled in before the animal does something wonderful. Being ready is half of golden-hour photography.
- Set aperture, shutter and auto ISO before the moment
- Shoot raw to recover highlights and warm tones later
- Meter for the sky for silhouettes, the subject for detail
- Use exposure compensation quickly as scenes change
- Take a test frame the instant you reach a sighting
Making the most of fleeting light
The single biggest difference between average and memorable safari images is simply being out in the good light and staying with it. Golden hour is brief and unrepeatable on any given morning, so aim to be in position before the sun clears the horizon and to linger at a sighting through the last warm minutes of the evening rather than heading back too soon. The finest light often arrives in the final moments, when others have already packed away.
Work with your guide, who knows where the light will fall and how animals tend to move, and communicate what you are hoping for so the vehicle can be positioned well ahead of time. Anticipate the shot: watch behaviour, pre-focus where you expect action, and keep both eyes open so you can react. Patience matters more than gear here — the photographers who come home with glowing images are usually the ones who stayed a little longer, waited a little more quietly, and were ready when the light and the moment finally aligned.
- Be in position before the sun clears the horizon
- Linger through the final warm minutes of the evening
- Tell your guide what shot you are hoping for
- Anticipate behaviour and pre-focus where action may happen
- Patience beats gear for catching the best light
References & further reading
- Sinclair, A. R. E., et al. (Eds.) (2015). Serengeti IV. Chicago: University of Chicago Press.
- Estes, R. D. (2012). The Behavior Guide to African Mammals. Berkeley: University of California Press.
- Kingdon, J. (2015). The Kingdon Field Guide to African Mammals (2nd ed.). London: Bloomsbury.
- IUCN (2024). The IUCN Red List of Threatened Species, Version 2024-1. www.iucnredlist.org.
Do it with SafariLingo
Take SafariLingo on safari: 500+ species, real animal calls, offline maps and sighting logs — all in your language, wherever you roam.
Get the appFrequently asked questions
When is golden hour on safari?
The roughly hour-long windows just after sunrise and just before sunset, when the sun is low and the light is warm, soft and directional. These also happen to be when wildlife is most active, which is why game drives are timed around them. The exact length varies with latitude and season, and closer to the equator the transition can be quite quick, so be ready early.
How do I photograph animals in golden light?
For warm, clean portraits, keep the low sun behind you so it lights the subject and puts a catchlight in the eyes. For more drama, use side light to reveal texture and long shadows. Adjust your exposure continually as the light changes quickly, and work with your guide to reposition the vehicle so the sun stays where you want it rather than shooting from wherever you stop.
How do I take silhouette photos on safari?
Shoot into the light, expose for the bright sky and let your subject go dark, reducing it to a clean, graphic shape. Choose a strong, recognisable outline — an acacia, a giraffe, an elephant — against an uncluttered, colourful sky, and place it thoughtfully in the frame with a little space around it. A gap between legs or a raised trunk reads far better than a shapeless mass.
Why do my midday safari photos look flat?
Because the high midday sun is harsh and direct, casting hard shadows and blowing out highlights, which flattens everything into a lifeless glare. Shoot in the golden hours instead for warm, soft, flattering light, and use the harsh midday hours for resting, reviewing images and scouting. If you must shoot at noon, look for shade, water reflections or backlit dust to add interest.
What camera settings work best for golden hour?
There is no single recipe, but a useful starting point is aperture-priority or manual with a moderately wide aperture for portraits, a shutter fast enough to freeze movement, and auto ISO with a sensible ceiling. Shoot in raw so you can recover highlights and warm tones afterwards, meter thoughtfully for either the sky or the subject depending on your intent, and learn to use exposure compensation quickly as the scene changes.
Related guides
 Planning & Tips
 Responsible Safari: Dos and Don'ts
Practical, field-tested guidelines for behaving responsibly on safari around wildlife, communities and the environment—so sightings stay calm, animals stay wild, and your trip supports conservation.
Planning & Tips Private Reserves vs National Parks
Private reserves versus national parks on safari: how rules, activities, crowding, guiding and cost differ, and a clear framework to choose or combine them.
Planning & Tips Self-Drive vs Guided Safari
Should you self-drive or take a guided safari? An honest comparison of freedom, cost, expertise and wildlife-spotting success.